Wednesday, August 17, 2011

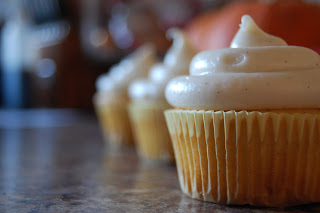
Vanilla Bean Cupcakes with Vanilla Bean Cream Cheese Frosting

The next couple of posts are going to be recipes from my previous post of pictures from the last year. Yea! First up are the vanilla bean cupcakes I made last August. These were test cupcakes for my sister's wedding celebration for when her and my brother-in-law get back from Afghanistan in December. And since she wasn't here to taste them I got to frost them with cream cheese frosting! My favorite! Because let's be honest, everything is better with cream cheese frosting. My sister, Rose, is one of those weirdos who does not like cream cheese frosting. She is also one of those weirdos that used to sit under our kitchen table as a toddler and eat butter. Ewwww!


Vanilla Bean Cupcakes
(Adapted from The Comfort of Cooking)

1 1/3 cups of flour
1/2 tsp. baking soda
1/2 tsp. baking powder
1/4 tsp. salt
1/4 cup of butter (I used non-fat plain yogurt)
1 cup of sugar (I used 1/2 cup)
1 egg
1 tsp. vanilla (I used 1 tsp + 2 vanilla bean pods)
1 cup buttermilk (I used skim milk w/ 1 Tbsp. vinegar)

1. Preheat oven to 350. Line your cupcake pans with liners or grease and flour them.
2. Sift together your dry ingredients in a small bowl and set aside.
3. With a mixer or by hand, combine the yogurt and sugar. Add in your egg, the vanilla, and the vanilla beans until nice and smooth :)
4. Alternate adding your dry ingredients and milk to your wet mixture.
5. Fill your cupcake liners 1/2 to 3/4 full, depending on how big of a top you like your cupcakes to have. I prefer mine to come exactly even with the top of the liner, so I only fill mine 1/2 full.
6. Bake for about 12-15 mins. Check with a toothpick at 12 mins. They should have a slight golden color to them. Yum :)
7. Let them cool for about an hour or so before frosting.
*Recipe says it makes 12 cupcakes, but if you fill your liners only half ways you can get about 18.


Vanilla Bean Cream Cheese Frosting
Recipe by Me :)

12 ounces of 1/3 less fat cream cheese, softened (or you can be bad and use regular. I won't tell :)
1 stick unsalted butter, softened
4-5 cups of powdered sugar
2-3 vanilla beans (I love vanilla so I used 3)
1 Tbsp. vanilla extract
*2 Tbsp. milk or half/half if the frosting seems a little dry

1. With a paddle attachment or regular hand mixer, whip your cream cheese and butter together. Add you vanilla extract and the seeds from your vanilla beans.
2. Mix in your powdered sugar about a cup at a time to avoid the powdered sugar cloud :)
3. Once all your powdered sugar has been added, if the frosting seems a little too stiff to pipe go ahead and add the milk or half/half. I've made my frosting with and without it and both ways are delicious!
4. Now frost away!


Since my BSM (Big Sexy Man) doesn't have a huge sweet tooth like me, he ate maybe 2 and I ate like 2 a day! 
What can I say, I LOVE cupcakes!

Stay tuned for my next baking adventure :)


Pin It

Friday, August 12, 2011

This absent blogger's past year, as told by pictures!

August 2010


September 2010


October 2010


October 2010


November 2010


December 2010


February 2011


February 2011


February 2011


March 2011


March 2011


April 2011


April 30, 2011


May 2011


June 2011


July 2011

Stay tuned for my next baking adventure :)

Wednesday, December 1, 2010

No food :( Big news :)

So what is the deal?
I'm blogging, I'm not blogging, I'm blogging, I'm not blogging.
Well, I think we are finally in the safe zone to where we can finally start to let more people know that.....
we are having one of these!


No not a bee! A baby! Isn't my niece such a cutie pie?
I feel like she is thinking, "I will sting you if you do not release me NOW!"
Anyways, I'll be 4 months next week and am still having all day nausea. Which has been such a pain because I love to bake and cook and for the last couple of months I've done neither, except to boil water for pasta. So I apologize to the wonderful readers of my blog. With Christmas fast approaching I'm trying to psych myself up for holiday baking. Yea! So please don't lose faith in me yet.

And while you wait, definitely check out This Just In. Gnightgirl and I met backstage at a Jason Aldean concert back in October while waiting to get a photo with the man himself. (My BSM won us free tickets and backstage passes!) How cool to run into another blogger just standing in line for a photo! She was even awesome enough to send a shout out to my blog. I'm just sorry it's taken me so long to get on here and link to her blog, or actually blogs plural because she has several. So go check her out!

Stay tuned for my next baking adventure!

Monday, September 27, 2010

Daring Bakers and some sugar cookie pops from The Swamp! Go Gators!


The September 2010 Daring Bakers’ challenge was hosted by Mandy of “What the Fruitcake?!” Mandy challenged everyone to make Decorated Sugar Cookies based on recipes from Peggy Porschen and The Joy of Baking.


Thank you Mandy for our first challenge of the fall! It's always so much fun when a recipe is chosen that basically gives you a blank canvas to get super creative with decorating your challenge. The only two things that were a must for this challenge was the sugar cookie recipe and our cookies had to be September themed. Or to be more exact, what we think of when we think of September. In our house September means one thing, Gator season starts! No I don't mean hunting gators. Although my BSM (Big Sexy Man) and I do enjoy some good gator meat every now and then. Not on game days though because we wouldn't wanna jinx em or anything. Duh! So anyways I obviously mean college football starts. Every Saturday from now to December is dedicated to football. BSM wears one of his many Gator t-shirts or hoodies. I too gear up with a t-shirt or my fav Gator hoodie and of course I ALWAYS wear,
drumroll please,
Gator underwear!
Not actual made of gators underwear, but cute lil boyshorts in blue and orange with the signature Gator symbol on them. Go ahead and laugh, but every time I wear em they win. So there! Well now that you know what kinda panties I wear every Saturday I guess we'll move straight on to the recipe. As you can see I chose to make mine into sugar cookie pops. Yum!


Preparation Time

30 minutes: Making dough & rolling
1 hour min: Refrigeration
8-15 minutes: Baking per tray depending on size of cookies


Basic Sugar Cookies


Makes Approximately 36x 10cm / 4" Cookies


200g / 7oz / ½ cup + 6 Tbsp Unsalted Butter, at room temperature
400g / 14oz / 3 cups + 3 Tbsp All Purpose / Plain Flour
200g / 7oz / 1 cup Caster Sugar / Superfine Sugar
1 Large Egg, lightly beaten
5ml / 1 tsp Vanilla Extract / Or seeds from 1 vanilla bean


Directions
• Cream together the butter, sugar and any flavourings you’re using. Beat until just becoming creamy in texture.
Tip: Don’t over mix otherwise you’ll incorporate too much air and the cookies will spread during baking, losing their shape.
• Beat in the egg until well combined, make sure to scrape down the sides of the bowl. Add the sifted flour and mix on low until a non sticky dough forms.
Tip: I don’t have a stand mixer so I find it easier to switch to dough hooks at this stage to avoid flour flying everywhere.
• Knead into a ball and divide into 2 or 3 pieces.
• Roll out each portion between parchment paper to a thickness of about 5mm/1/5 inch (0.2 inch)
• Refrigerate for a minimum of 30mins.
Tip: Recipes commonly just wrap the whole ball of dough in clingwrap and then refrigerate it for an hour or overnight, but by rolling the dough between parchment, this shortens the chilling time and then it’s also been rolled out while still soft making it easier and quicker.
• Once chilled, peel off parchment and place dough on a lightly floured surface.
• Cut out shapes with cookie cutters or a sharp knife.
• Arrange shapes on parchment lined baking sheets and refrigerate for another 30mins to an hour.
Tip: It’s very important you chill them again otherwise they’ll spread while baking.
• Re-roll scraps and follow the above process until all scraps are used up.
• Preheat oven to 180°C (160°C Fan Assisted) / 350°F / Gas Mark 4.
• Bake until golden around the edges, about 8-15mins depending on the size of the cookies.
Tip: Bake same sized cookies together otherwise mixing smaller with larger cookies could result in some cookies being baked before others are done.
Tip: Rotate baking sheets half way through baking if your oven bakes unevenly.
• Leave to cool on cooling racks.
• Once completely cooled, decorate as desired.
Tip: If wrapped in tinfoil/cling wrap or kept in airtight containers in a cool place, un-decorated cookies can last up to a month.


Royal Icing


315g – 375g / 11oz – 13oz / 2½ - 3 cups Icing / Confectioner’s / Powdered Sugar, unsifted
2 Large Egg Whites
10ml / 2 tsp Lemon Juice
5ml / 1 tsp Almond Extract, optional


Directions
• Beat egg whites with lemon juice until combined.
Tip: It’s important that the bowls/spoons/spatulas and beaters you use are thoroughly cleaned and grease free.
• Sift the icing sugar to remove lumps and add it to the egg whites.
Tip: I’ve listed 2 amounts of icing sugar, the lesser amount is good for a flooding consistency, and the larger amount is for outlining, but you can add even more for a much thicker consistency good for writing. If you add too much icing sugar or would like to make a thinner consistency, add very small amounts of water, a few drops at a time, until you reach the consistency you need.
• Beat on low until combined and smooth.
• Use immediately or keep in an airtight container.
Tip: Royal Icing starts to harden as soon as it’s in contact with air so make sure to cover containers with plastic wrap while not in use.


Decorating Your Cookies: Royal Icing


The most important thing when it comes to decorating with Royal Icing is the consistency.
There are two ways of flooding your cookies. Some like to do the outline with a thicker icing and then flood with a thinner icing. Some like to use the same icing to do both which saves time and you don’t have to have two different piping bags for each colour you’re using.


The Same Consistency Method
Consistency:
• Mix your royal icing according to the recipe/instructions
• Drag a knife through the surface of the Royal Icing and count to 10
• If the surface becomes smooth between 5 & 10 seconds, the icing is at the correct consistency.
Tip: If your icing is too thick, thin it by adding a few drops of water. Mix, do the 10 second test, then if it’s still too thick, add a few more drops of water, repeat, etc.
Tip: To thicken your icing, add small amounts of icing sugar until thick enough for the 10 second test.


Two Different Consistencies Method
Consistency:
• Mix your royal icing according to the recipe/instructions.
• Separate into 2 different bowls, one lot of icing for outlining, the other for flooding.
• For the outlining icing, drag a knife through the surface of the Royal Icing.
• If the surface becomes smooth at around 10 seconds, the icing is at the correct consistency.
Tip: If your icing is too thick, thin it by adding a few drops of water. Mix, count to 10 seconds, then if it’s still too thick, add a few more drops of water, repeat, etc.
Tip: To thicken your icing, add small amounts of icing sugar until thick enough for the 10 second test.
• For the flooding/filling icing, drag a knife through the surface of the Royal Icing.
• If the surface becomes smooth at around 3-4 seconds, the icing is at the correct consistency.
Tip: If your icing is too thick, thin it by adding a few drops of water. Mix, count to 3-4 seconds, then if it’s still too thick, add a few more drops of water, repeat, etc.
Tip: To thicken your icing, add small amounts of icing sugar until thick enough for the 3-4 second test.


This Saturday the Crimson Tide better be prepared because The Swamp is comin to Bama!
Go Gators!!!
Stay tuned for my next baking adventure!
Pin It

Friday, August 27, 2010

Sweet Baby Baked Alaskas


The August 2010 Daring Bakers’ challenge was hosted by Elissa of 17 and Baking. For the first time, The Daring Bakers partnered with Sugar High Fridays for a co-event and Elissa was the gracious hostess of both. Using the theme of beurre noisette, or browned butter, Elissa chose to challenge Daring Bakers to make a pound cake to be used in either a Baked Alaska or in Ice Cream Petit Fours. The sources for Elissa’s challenge were Gourmet magazine and David Lebovitz’s “The Perfect Scoop”.
Thank you Elissa for such a fun challenge! Now on to the recipes :)


Originally I had been thinking of doing a cookie dough ice cream because browned butter makes me think of chocolate chip cookies all warm from the oven and soft and wonderful....Sorry, I was having a moment. Ok so that night after finding out what the new challenge would be I was telling my BSM (Big Sexy Man) what flavor I was planning for the ice cream when he sweetly looks at me with his big gorgeous brown eyes and asks, "Can it be peanut butter cup ice cream instead?" How do you say no when your man is giving you "the look"? Obviously I said yes which meant I had to find a peanut butter ice cream recipe. Lucky for me lots of fellow bloggers have David Lebovitz's "The Perfect Scoop" and in it is a peanut butter ice cream recipe, which I found here. The only adjustment I made was adding almost twice the amount of peanut butter cups. YUM :)


After the ice cream was well on its way to delicious scoopableness (yes that is a word, ok maybe not in the dictionary but it should be) I started on the browned butter pound cake. Since mini Baked Alaskas was what I was after, cupcake size is what I made. Aren't they cute? Wait did someone take a bite outta that lil guy?! (chewing) That's shocking! (still chewing)

Brown Butter Pound Cake


19 tablespoons (9.5 oz) (275g) unsalted (sweet) butter
2 cups (200g) sifted cake flour (not self-rising; sift before measuring) (See “Note” section for cake flour substitution)
1 teaspoon (5g) baking powder
1/2 teaspoon (3g) salt
1/2 cup (110g) packed light brown sugar
1/3 (75g) cup granulated sugar
4 large eggs
1/2 teaspoon pure vanilla extract


1. Preheat the oven to 325°F/160°C and put a rack in the center. Butter and flour a 9”x9” (23cmx23cm) square pan.
2. Place the butter in a 10” (25cm) skillet over medium heat. Brown the butter until the milk solids are a dark chocolate brown and the butter smells nutty. (Don’t take your eyes off the butter in case it burns.) Pour into a shallow bowl and chill in the freezer until just congealed, 15-30 minutes.
3. Whisk together cake flour, baking powder, and salt.
4. Beat the brown butter, light brown sugar, and granulated sugar in an electric mixer until light and fluffy, about 2 minutes. Beat in the eggs one at a time, mixing well, and then the vanilla extract.
5. Stir in the flour mixture at low speed until just combined.
6. Scrape the batter into the greased and floured 9”x9” (23cmx23cm) square pan. Smooth the top with a rubber spatula and rap the pan on the counter. Bake until golden brown on top and when a toothpick inserted into the center comes out clean, about 25 minutes.
7. Cool in the pan 10 minutes. Run a knife along the edge and invert right-side-up onto a cooling rack to cool completely.


Meringue (For the Baked Alaska)


8 large egg whites
½ teaspoon (3g) cream of tartar
½ teaspoon (3g) salt
1 cup (220g) sugar


Beat the egg whites, cream of tartar, and salt on high speed in an electric mixer until soft peaks form. Beat in the sugar gradually in a slow stream until stiff peaks form.


If you can't tell from the melting ice cream on the pan I did not have a torch and had to throw them in the oven to toast the meringue. Melting ice cream aside I thought they were a huge success and so much fun to make.
 
 
I'm guessin my BSM and my parents liked it because everyone was pretty quiet after the first forkful. And then our plates looked like this.
 
 
On a side note I thought I'd share our wonderful new addition, our beautiful adorable niece Brielle. I can't wait to give that sweet baby face some ice cream in a few months. Sadly she is still too tiny for any good food yet.
 
 
Stay tuned for my next baking adventure!
Pin It

Monday, July 19, 2010

I'm back! with 250, no make that 260 cupcakes!!!


Ok, so technically I started writing this post back in May when I actually made all of these cupcakes, but then got sidetracked by some other exciting news in my life. More on that later ;) It is actually kind of perfect though seeing as I have been on a blogging break for the last year minus 10 days. So much has happened, not that very many people read my little blog, but I thank those that did follow it and everyone who ever left a comment. Now on to the cupcakes.


In May a professor in our college was retiring and anytime someone retires we throw them a party. My co-worker who organizes these events asked if I would be interested in making the cupcakes. Obviously I jumped at this opportunity because for years I've been wanting to have my own little cupcake business and this would be the perfect start. She wanted 250 cupcakes, half vanilla and half chocolate with a pale blue swirl of buttercream to match the blue on the invitations, as well as crystal sugar to give the cupcakes some sparkle.


Since this was going to be my first time ever making dozens upon dozens upon dozens of cupcakes I did cheat a little and bought boxed cake mix. This also helped to keep the cost down and gave me some major insight into what it will take to get a business going cost wise :o I went with a devils food and a white cake mix. To the white I added some homemade vanilla extract and real vanilla bean so the cupcakes would have a homemade look and taste. The devils food was surprisingly good for a box mix and tasted yummy with the buttercream. Altogether there were 260 cupcakes because of some technical difficulties in the beginning. Ooops :)


After 2 days of baking and frosting, 8 or 9 boxes of cake mix, endless pounds of buttercream frosting, 8 stuffed bakery boxes, one cupcake tower built by moi, and one patient saint of a boyfriend the cupcakes had made it safely to work with me. I set them up and put out my little card with my business name, which my co-worker insisted I do because how else was anyone going to know what my business was called. And since the name behind the business needed to mean something and because of how super supportive he's been, I named it after my sweet sweet boyfriend. Awwww! (go ahead and take a minute to wipe the tears of happiness or of laughing too hard. go ahead grab a kleenex.)


In the end the cupcakes were a hit! And I've been asked to make some wedding cupcakes for this fall. Yea!

Stay tuned for my next baking adventure!

Wednesday, July 29, 2009

Daring Bakers presents: marshmallow cookies, mint milans, and a lazy blogger :(


The July Daring Bakers' challenge was hosted by Nicole at Sweet Tooth. She chose Chocolate Covered Marshmallow Cookies and Milan Cookies from pastry chef Gale Gand of the Food Network.


Thank you Nicole for such a delicious challenge! These cookies are some of my favorites from childhood. The marshmallow ones tasted just like the Pinwheel cookies my grandma would buy for me when I was little. And as for the milan cookies, I absolutely love mint milanos, so I made mine with mint extract. And I would like to take this opportunity to point out what a procrastinator I have become lately. Case in point, I made these cookies 4th of July weekend! Shame on me :( I promise, promise, promise to post on time and be a better blogger for the few people who do read my blog. Enjoy the recipes below and please stop by our hostess's blog as well as our fellow bloggers to check out how they did.


Mallows (Chocolate Covered Marshmallow Cookies)
Recipe courtesy of Gale Gand, from Food Network website


Prep Time: 10 minutes
Inactive Prep Time: 5 minutes
Cook Time: 10 minutes
Serves: about 2 dozen cookies
3 cups all purpose flour
1/2 cup white sugar
1/2 teaspoon salt
3/4 teaspoon baking powder
3/8 teaspoon baking soda
1/2 teaspoon ground cinnamon
12 tablespoons unsalted butter
3 eggs, whisked together
homemade marshmallows, recipe follows
chocolate glaze, recipe follows


1. In the mixer with the paddle attachment, blend the dry ingredients.
2. On low speed, add the butter and mix until sandy.
3. Add the eggs and mix until combined.
4. Form the dough into a disk, wrap with clingfilm or parchment and refrigerate at least 1 hour and up to 3 days.
5. When ready to bake, grease cookie sheet or line it with parchment paper or a silicon mat.
6. Preheat the oven to 375 degrees F.
7. Roll out the dough to 1/8 of an inch thickness, on a lightly floured surface. Use a 1 to 1 1/2 inches cookie cutter to cut out small rounds of dough.
8. Transfer to the prepared pan and bake for 10 minutes or until light golden brown. Let cool to room temperature.
9. Pipe a "kiss" of marshmallow onto each cookie. Let set at room temp for 2 hours.
10. Line a cookie sheet with parchment or silicon mat.
11. One at a time, gently drop the marshmallow-topped cookies into the hot chocolate glaze.
12. Lift out with a fork and let excess chocolate drip back into the bowl.
13. Place on the prepared pan and let set at room temperature until the coating is firm, about 1 to 2 hours.


*Note: If you don't want to make your own marshmallows, you can cut a large marshmallow in half and place on the cookie base. Heat on a 35o degree oven to slump the marshmallow slightly, it will expand and brown a little. Let cool, then proceed with the chocolate dipping.


Homemade Marshmallows
1/4 cup water
1/4 cup light corn syrup
3/4 cup sugar
1 tablespoon powdered gelatin
2 tablespoons cold water
2 egg whites, room temperature
1/4 teaspoon pure vanilla extract


1. In a saucepan , combine the water, the syrup, and sugar, bring to a boil until "soft-ball" stage, or 235 degrees on a candy thermometer.
2. Sprinkle the gelatin over the cold water and let dissolve.
3. Remove the syrup from the heat, add the gelatin, and mix.
4. Whip the whites until soft peaks form and pour the syrup into the whites.
5. Add the vanilla and continue whipping until stiff.
6. Transfer to a pastry bag.


Chocolate Glaze


12 ounces of semisweet chocolate
2 ounces cocoa butter or vegetable oil


1. Melt the 2 ingredients together in the top of a double boiler or a bowl set over barely simmering water.

Milan Cookies
Prep Time: 20 minutes
Inactive Prep Time: 0 minutes
Cook Time: 1 hour
Serves: about 3 dozen cookies

12 tablespoons of unsalted butter, softened
2 1/2 cups powdered sugar
7/8 cup egg whites (from about 6 eggs)
2 tablespoons vanilla extract (I added 1 extra tablespoon)
2 tablespoons lemon extract (I omitted this)
1 1/2 cups all purpose flour
cookie filling recipe follows

Cookie Filling:
1/2 cup heavy cream
8 ounces semisweet chocolate, chopped
2 teaspoons mint extract

1. In a mixer with paddle attachment cream the butter and sugar.
2. Add the egg whites gradually and then mix in the vanilla and lemon extracts.
3. Add the flour and mix until just well mixed.
4. With a small (1/4) plain tip , pipe 1-inch sections of batter onto a parchment lined sheet pan, spacing them 2 inches apart as they spread.
5. Bake in a preheated 350 degree oven for 10 minutes or until light golden brown around the edges. Let cool on the pan.
6. While waiting for the cookies to cool, in a small saucepan over medium flame, scald cream.
7. Pour hot cream over chocolate in a bowl, whisk to melt chocolate, add zest and blend well.
8. Set aside to cool (the mixture will thicken as it cools).
9. Spread a thin amount of the filling onto the flat side of a cookie while the filling is still soft and press the flat side of a second cookie on top.
10. Repeat with the remainder of the cookies.


Stay tuned for my next baking adventure!
Pin It